Weekend Cooking:
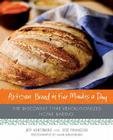
Artisan Bread in Five Minutes a Day is one of my most treasured recipe books-you can tell by all the sticky notes fanning out from the book. I love making fresh bread 'cuz it goes with every meal, especially in the winter when many of my meals are soup-related or hearty.
Here is the general recipe so you can try it too:
The Master Recipe: Boule (Artisan Free-Form Loaf) [edited down just a bit]
3 cups lukewarm water
1 1/2 T. granulated yeast **did you know you can buy yeast in bulk at your local organic store-how great is that**
1 1/2 T. kosher, coarse salt
6 1/2 cups unsifted, unbleached, all-purpose white flour, measured with scoop-and-sweep method
Cornmeal for pizza peel [I do not have a pizza peel~I put the cornmeal on my baking stone; I have one stone in the oven and one I use as the peel]
Mixing and Storing Dough
1. Warm the water slightly: It should feel just a little warmer than body temp., about 100 degrees F.
2. Add yeast and salt to the water in a 5-qt. bowl or, preferably, in a resealable, lidded but not airtight plastic food container or food-grade bucket. Don't worry about getting it all to dissolve. [My mom just gave me an early Xmas gift, at T.giving, this square dough container from King Arthur Flour-Thank You, Mom]
3. Mix in the flour-kneading is not necessary. Add all the flour at once, measuring it in with dry-ingredient measuring cups, by gently scooping up flour, then sweeping the top level with a knife or spatula; don't press down into the flour as you scoop or you'll throw off the measurments. Mix with a wooden spoon, until it gets to difficult, then use your own wet hands. Don't knead-just incorporate the flour so everything is uniformly moist.
4. Allow to rise: Cover with a lid (not airtight). Do not use screw-topped bottles or mason jars, which could explode as dough rises. Allow the mixture to rise at room temperature until it begins to collapse, approximately 2 hours. Longer rising will not harm the result. You can use a portion of the dough now if you like. Fully refrigerated wet dough is less sticky and is easier to work with than dough at room temperature. Best to refregerate a day first before working with it.
5. Baking Day: Sprinkle pizza peel with cornmeal. Sprinkle the surface of your cold dough with flour. Pull up and cut off a 1-pound [grapefruit-size] piece of dough, using a serrated knife. Hold the mass of dough in your hands and add a little more flour as needed so it won't stick to your hands. Gently stretch the surface of the dough around to the bottom on all four sides, rotating the ball a quarter-turn as you go. Most of the dusting flour will fall off; it's not intended to be incorporated into the dough. The bottom of the load will seem a bit bunchy but it will flatten out during rising time. The correctly shaped final loaf will be smooth and cohesive.
6. Rest the loaf and let it rise on a pizza peel: Place shaped ball on the cornmeal-dusted pizza peel. Allow the loaf to rest on the peel for about 40 minutes. Depending on the age of the dough, you may not see much rise.
7. Twenty minutes before baking, preheat oven to 450 degreesF., with a baking stone placed on the middle rack. Place an empty broiler tray for holding water on any other shelf that won't interfere with the rising bread.
8. Dust and slash: Unless otherwise indicated for another recipe, dust the top of the loaf liberally with flour, which will allow the slashing knife to pass without sticking. Slash a 1/4-inch-deep cross, "scallop", or tic-tac-toe pattern into the top, using a serrated bread knife. [This is where the photo in the book really helps...]
9. Bake with steam: After the 20-minute preheat, you're ready to bake, even though your oven won't yet be up to full temperature. With a forward jerk, transfer loaf from one stone or peel to the hot stone in the oven. Quickly but carefully pour about 1 cup of hot tap water into broiler tray and close the oven door. Bake for 30 minutes or until crust is nice and brown. Allow to cool completely on a wire rack.
10. Store remaining dough back in your refrigerator in lidded container and use over the next 14 days. That means each time you make a delicious dinner-it just takes a few minutes to have fresh bread with your meal. YUM!! It looks like a lot of steps but it is really quite easy. If I can handle it; anyone can handle this recipe. Make this part of your holiday baking.

Shop Indie Bookstores


4 comments:
It's still the weekend until I wake up on Monday morning!
Bread always seems so complicated to make, but it's one of those things I'd like to try.
I have heard so many great things about this book that I bought it. But the dough does not work for me. I think my kitchen is too damp, but after three tries at tweaking the recipe I gave up. That was something like 30 cups of flour + other ingredients that I ended up throwing out. :(
I have made bread by other methods for 25 years. I guess I'll stick with my tried and true methods. I love the idea of this bread, I just can't get it to work.
I got my sister this book for Christmas, so I'm glad to see it's so good!
I love your blog! How fun! We did a lot of weekend cooking as well. I love the idea of making artisan bread regularly for dinner - yum! I'll have to try out this recipe. By the way, very cute pictures of the cookie bakeoff party!
Post a Comment